|
Jump to ... |
|
Congratulations on the acquisition of your new Iron Giant, Version 2.0. You are making America Great Again through the burning of fire, the griddling of food, and gracious and encouraging conversation. Light a fire, heat your steel, throw virtually any food on it … and bear witness to the sacramental good of communal cooking.
|
Jump to ... |
|
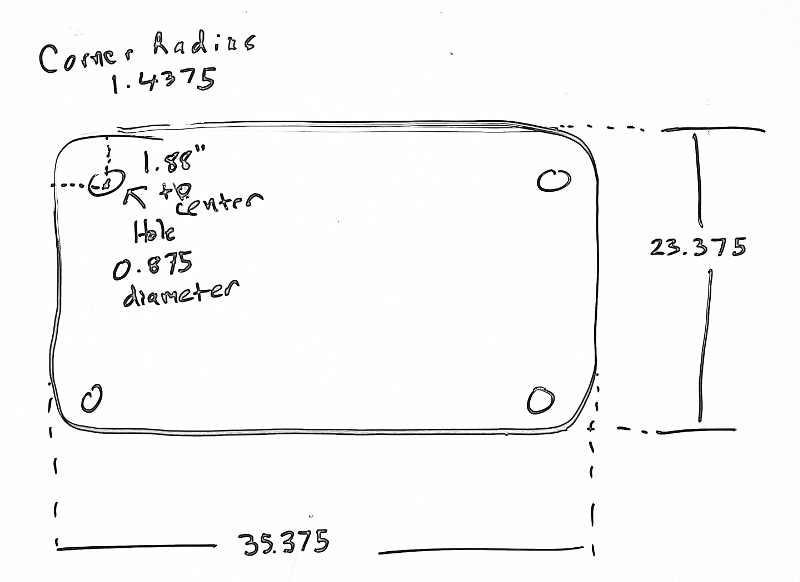
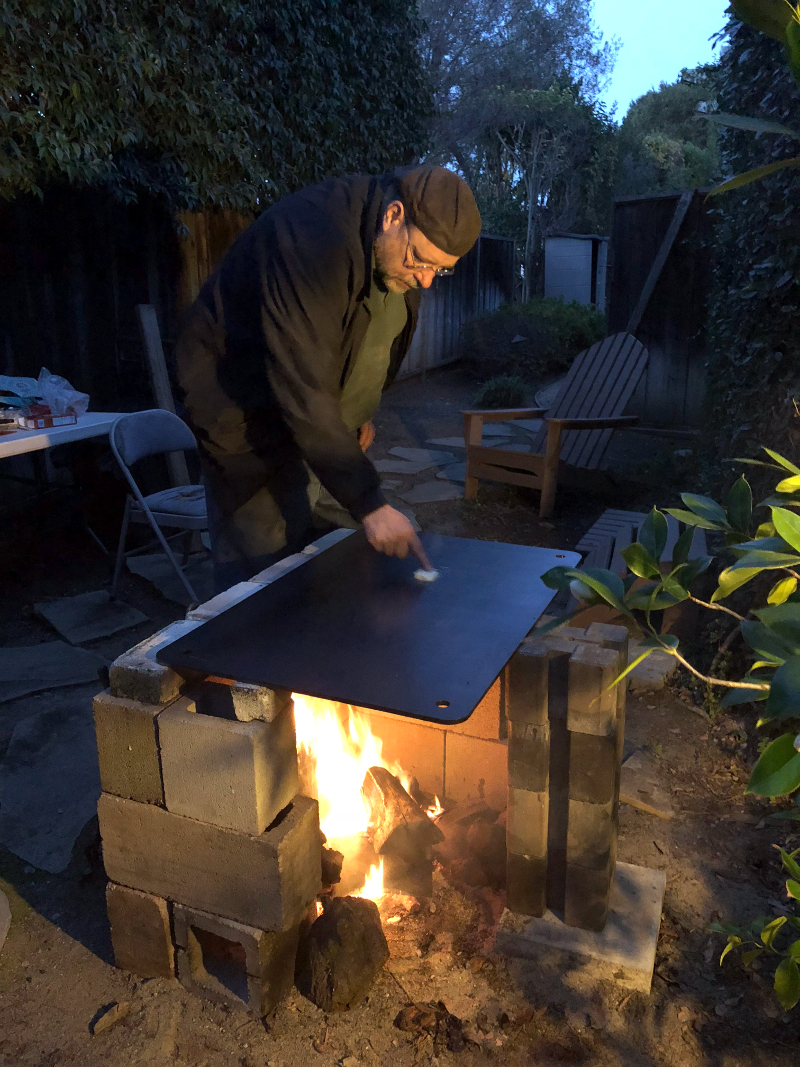
Your Iron Giant can be set up anywhere that you can light a fire. The Giant itself needs to be supported in some way. We recommend one or two walls of cinder block or brick (helpful for heat reflection and for protecting the cook from singed legs) and one or two corners supported with threaded steel legs. Your Giant has holes at each corner that can take 3/4” threaded rod, which can then be secured with hex-nuts, providing an adjustable and secure mount, allowing you to level the Giant out on any terrain.
Speaking of level, make the effort to set the blocks and dial in any other supports before you cook ... a pool of oil should sit happily in the middle of the Giant when poured—you won't want oil to be constantly draining off the edge of the giant when you are trying to cook with it.
However, choose your location with oil spillage in mind. Even if you are careful, oil and food will spill off the sides in every direction, so you might not want to set up on a clean surface that wants to stay that way.
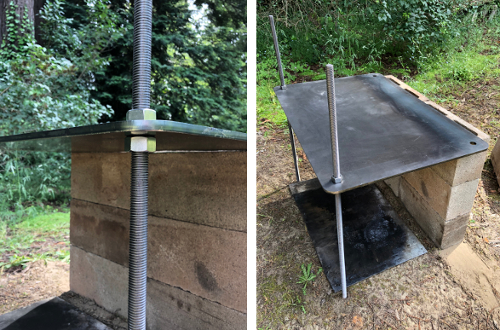
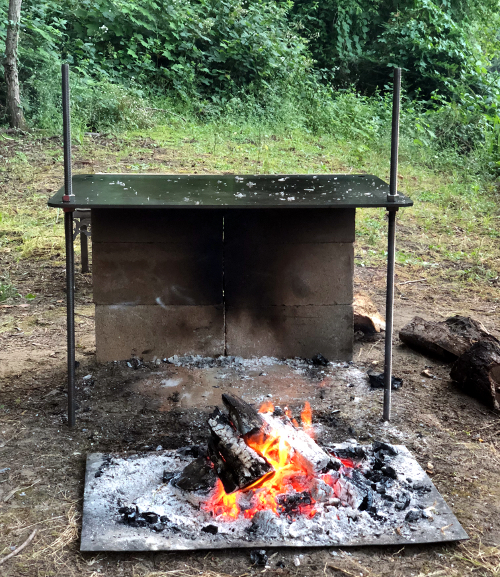
In these pictures note the wall of cinder blocks (three tall and two wide) and two 3 foot leg-rods. The hardware pictured can handle a taller wall, which means a higher cooking surface, but note that this might necessitate a raised (or bigger) fire. One brick wall is a good start (and essential, sez your legs), providing a fire that can be enjoyed by guests, but you may choose to enclose your fire (and support your Giant) with more than one wall. Three cinder-block walls would be enough to support the iron, no leg-rods needed.
Also note the flat slab of metal under the Giant (a copper fire basin is probably the best, if you have one that fits). While not necessary, this keeps the fire off the ground, and can be helpful in a couple instances. First, when setting up the Giant in a place where you don't want a pit of ashes to grow, a basin or sheet of metal allows you to contain the ashes somewhat. Second, simply having the fire on a movable surface means you can slide it out from under the Giant after the meal, when you don't need a hot surface any more, and what you do need is a fire to sit around. This is optional, because you can't hurt the Giant by having a dwindling fire under it after the meal. It may be simplest and acceptable to burn right on the ground.
Metal parts for the above setup can be purchased at BoltDepot.com or your Local Hardware Shop:
Note: use only steel (cheaper) or stainless steel (expensiver) Do not use galvanized metals, which release toxic gasses when heated, spoiling the mood.
Cinder blocks can also be purchased at any hardware store ... or scrounged as surplus, as long as they have no residual paint or other treatment that would vaporize when in contact with fire.
At a bare minimum, you will need the following ...
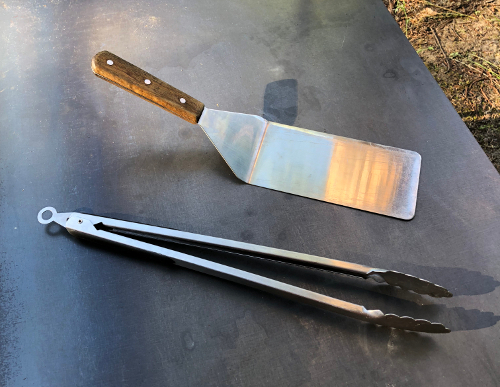
Optional goodies: a big lid for use as a steamer dome (like the $10 Cuisinart Melting Zone Grill Dome), a scraper (like a kitchen version of, say, a putty knife, Mike), and squirt bottles for delivering oil and water.
This cheap starter kit has spatulas, scraper, and squirt bottles.
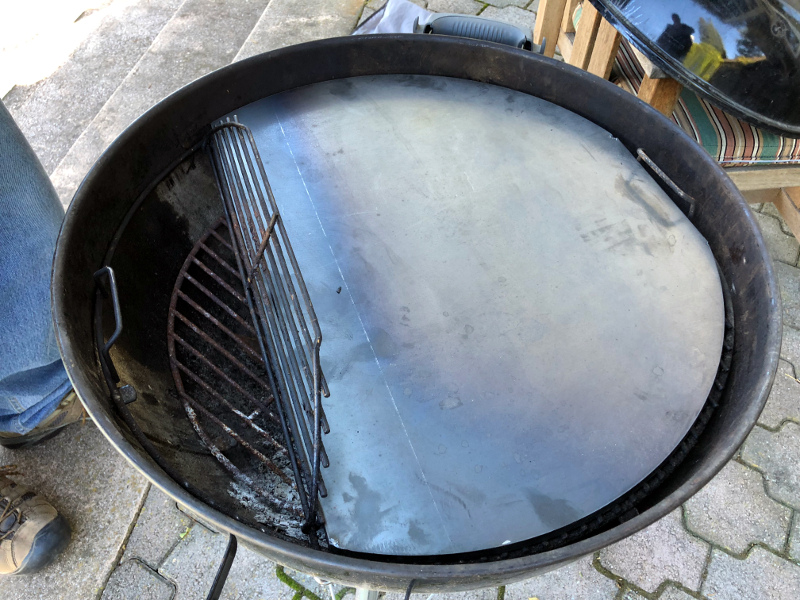
When you receive your Iron Giant, remove the factory-applied, industrial olive oil, and prep the surface according to your level of cooking-surface obsessions or compulsions. There may be rough edges or other signs that your Iron Giant has traveled directly from a union steel shop to you without stopping at the spa for an exfoliating apricot scrub. Like full grain leather, your Iron Giant will display the natural markings and characteristics of its prior life as a big piece of metal. Imperfections or rough edges can be reduced by filing, steel wool, etc. to ensure the smoothest surface for cooking. But note that minor imperfections are not likely to interfere with your griddle-mojo.
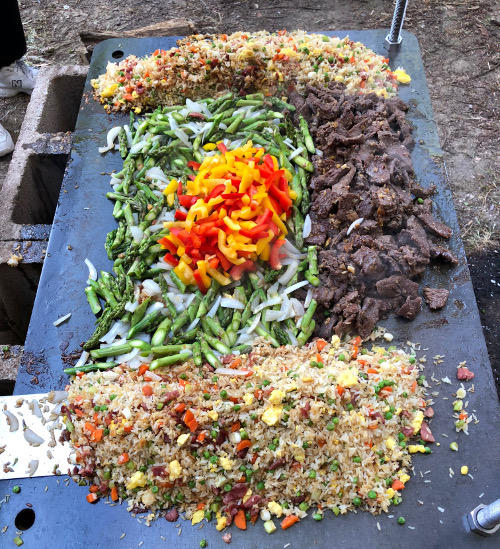
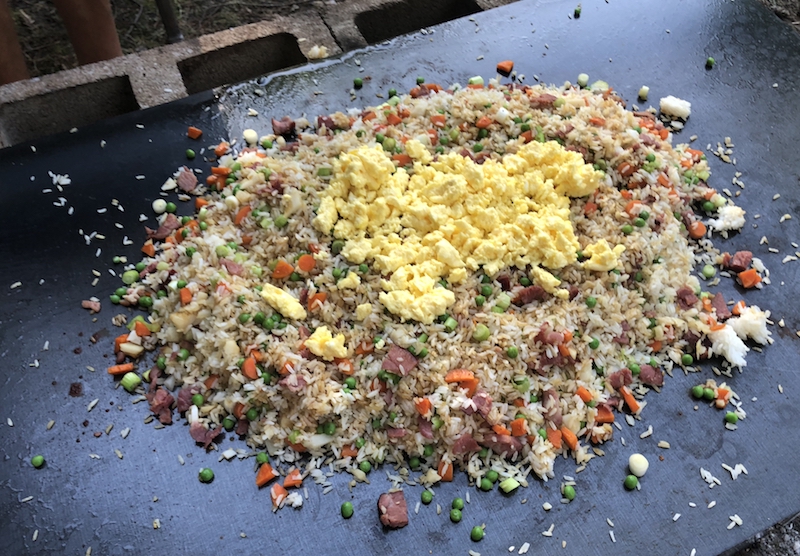
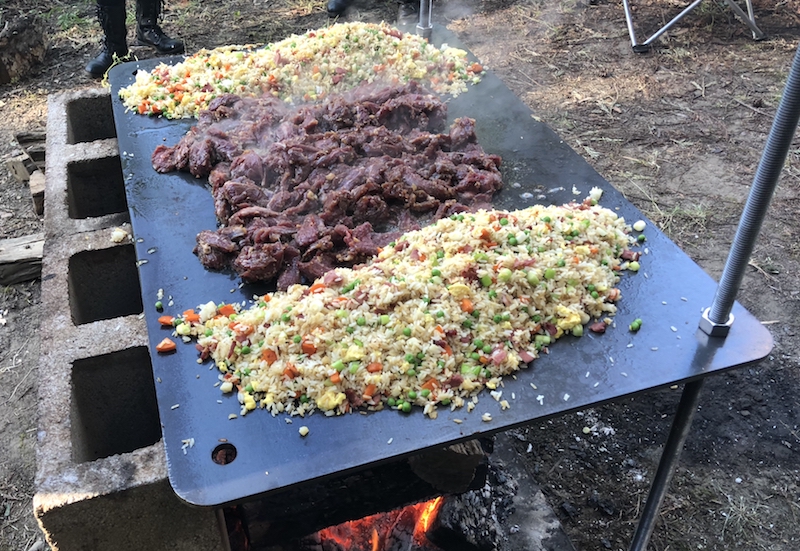
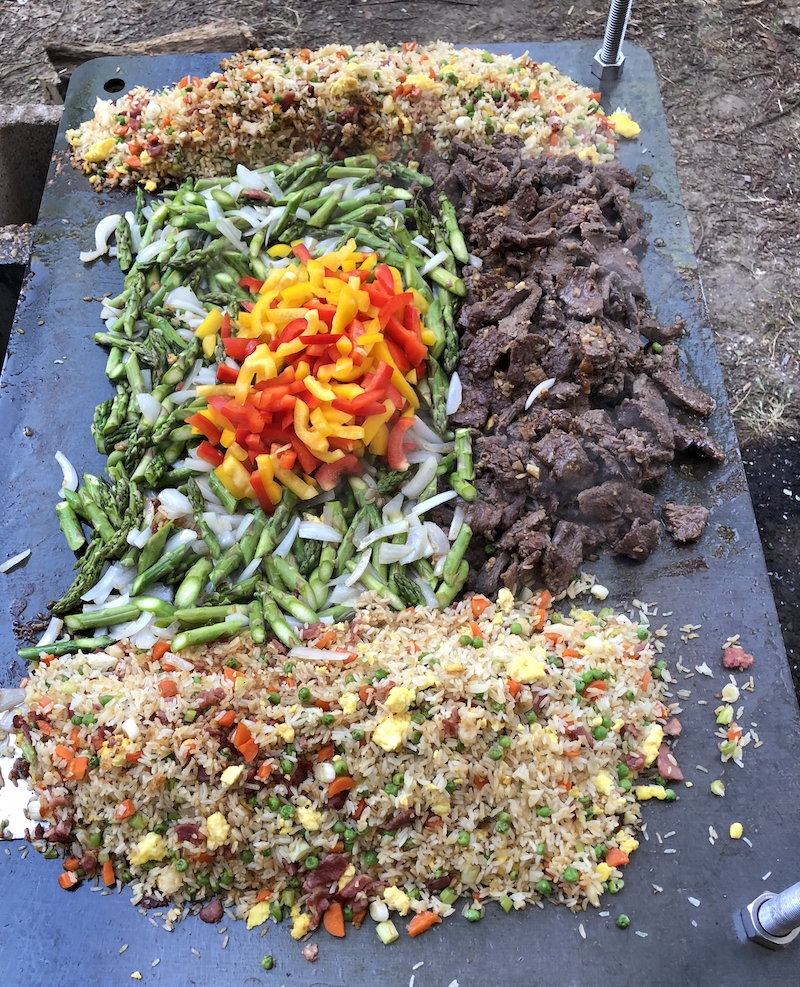
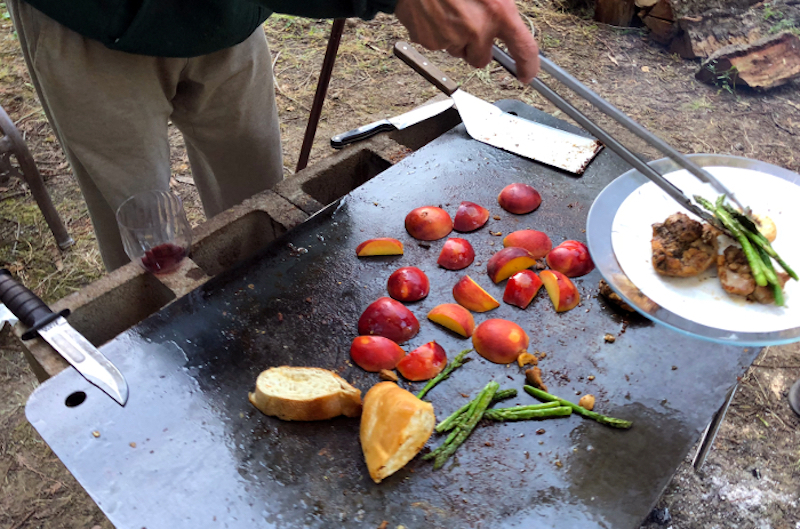
Note regarding temperatures: Dave has only ever splashed water on the hot surface to ensure that optimal cooking temperature has been reached (i.e. when a tsp of water boils/bounces), but some may like to use an IR thermo-gun to check temps in different spots on the Giant (it's 6 square feet after all, and will have distinct heat-zones). Depending on the fire you have built, the center is the obvious place for cooking, while the sides hold food in the keep-hot zone (see the stirfry below in the gallery for a visual).
The surface should always have a coating of oil to prevent rust, applied prior to and after cooking. It's always best to apply oil when the iron is hot. Again, your personal cast-iron compulsions will dictate how you treat the Iron Giant, but we've found that a good cleaning after cooking followed by an application of oil is all that is needed to keep the surface food-ready. When cooking and cleaning is done, and the heat is either removed from under the giant or burned down, we pour a 1/4 to 1/2 cup of any cooking oil on and spread it with a rag. As the iron cools, we like to ensure that the oil isn't pooling or veining ... simply rubbing with a rag once or twice before the meal has concluded does the trick.
For Iron Giant cooking, you'll need fire. Weber-top Iron Moon™ griddles can be coal-fired, but charcoal will not produce the heat required for the larger surface, sitting as it does in the open air and higher off the ground. A good fire is made from wood chopped to varying sizes, from arm-sized logs down through finger sized, all helped to ignite by a wad of shavings, which light with a single match. (Of course you can use paper, even soak it in a little oil, to make it light easier.) You can split wood yourself or buy pre-split.
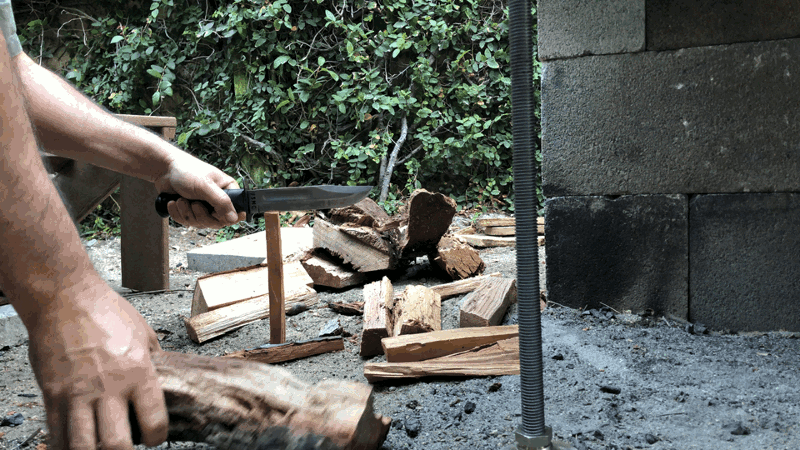
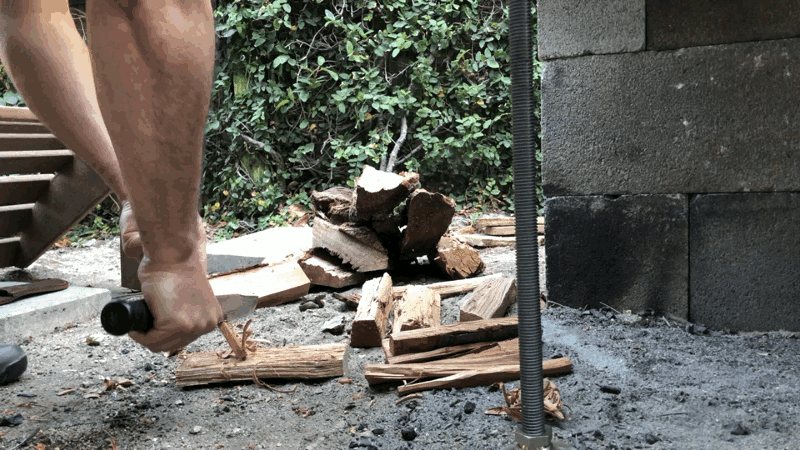
If you want to build an easily-lit wood fire with no cheats, you'll need to process smaller kindling. A sturdy knife (pictured is a Ka-Bar outdoor survival knife, with a heavy carbon-steel blade) is used to baton a piece of split wood into smaller pieces. Batoning is safer than using a splitting axe to reduce logs into smaller kindling. (Do NOT try batoning with anything but a burly outdoor knife that is made for this kind of use).
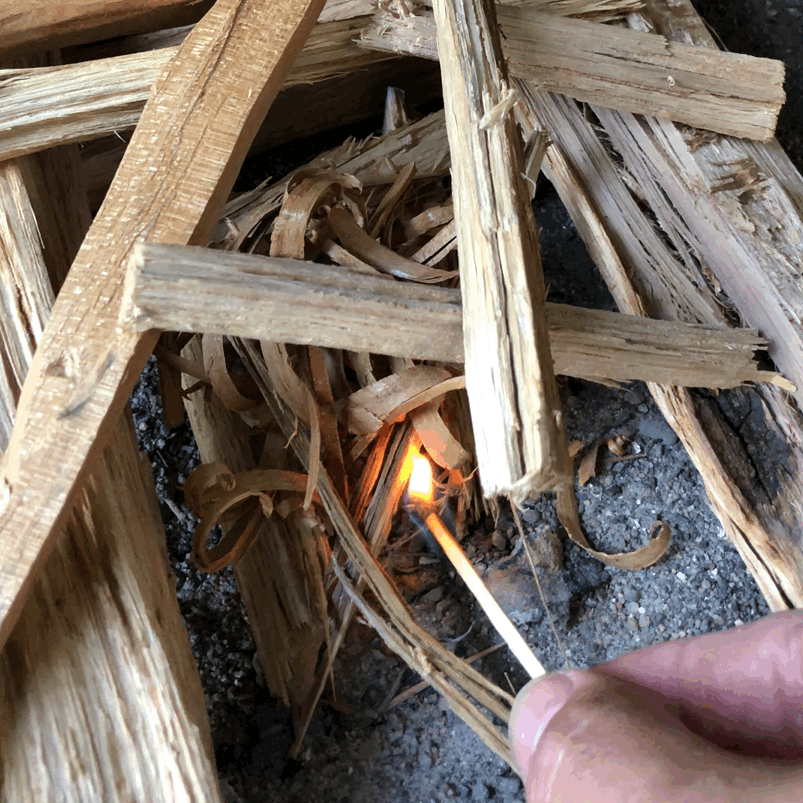
After making a bunch of finger-sized kindling, whittle one of these sticks down into shavings to make a tinder wad for lighting.
Make a small *hut* out of logs, with a floor of a couple small sticks to raise your wad of tinder off the ground, for airflow and to get a match under. Your hut will support a lattice of kindling to catch the flame.

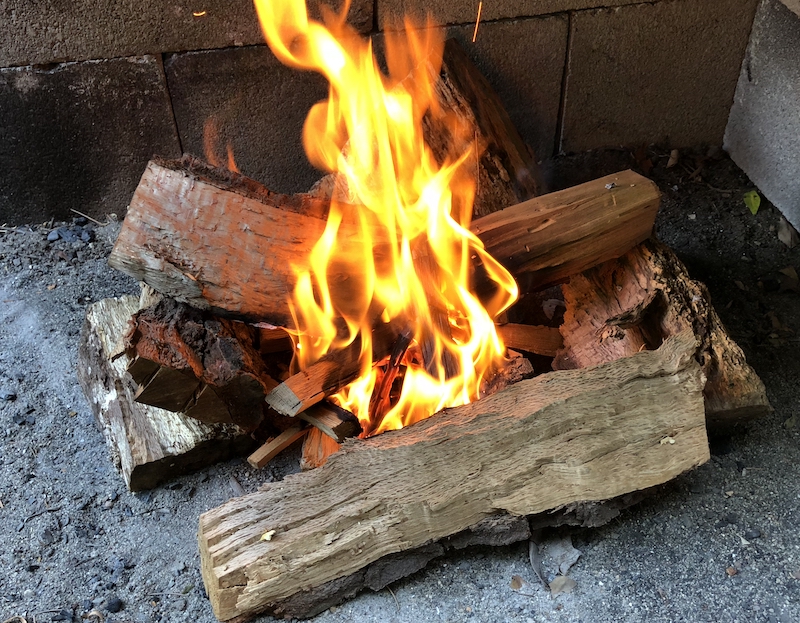
Once burning, begin to lay the rest of your kindling on top of and against the hut. Lay all pieces log cabin style, allowing for air to move between the logs. Continue to build the fire out with larger logs, making a structure as wide as you want your fire to cover ... like you're building a house around the small fire in the center. As the outer walls of your little cabin burn, flip them into the center, and lay more logs around the edges to heat up and ultimately be turned into the fire. Sturdy barbecue tongs and a poker or small shovel serve to move burning logs around to keep the fire under your food.
While the Giant is still hot, pour water over the surface for cleaning—the instantly boiling water will loosen all the food particles and oil. All you need to do is work the surface with your spatula or scraper. It's magic. Professional griddlers may also recommend cleaning "bricks" (scratchy pumice-like things), and you may benefit from their advice for removing food cruft, but Dave sez that water on a sizzling-hot and greasy surface has always been sufficient.
Follow the cleaning with a splash of oil, spread with a spatula or a rag, to keep the surface seasoned, weather resistant, and looking fine.
Store the Giant in a place protected from moisture and from contact with abrasive things. Though steel is tough and resiliant, scratches happen.
Cover the Giant with something that will protect it according to its exposure—plastic tablecloth for waterproofing if stored under the open sky, waxed cotton or other fabric if stored on its side under a shelter, e.g.. , be mindful of the possibility of moisture rising from the ground or otherwise humidifying/condensing under your cover. A well-seasoned surface should be pretty water-resistant (and, the possibility of a little rust on the underside, where there will be no seasoning, is of no concern.)
Even in the case of a zombie-and-rust apocalypse, the Giant can still be scrubbed clean with steel wool and something like Bar Keeper’s Friend, and re-seasoned (like cast iron and zombies, the Iron Giant will always come back). Note, however, that Bar Keeper’s Friend is not known to be an effective zombie repellant.
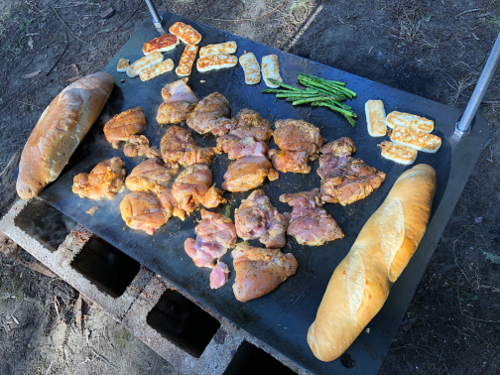
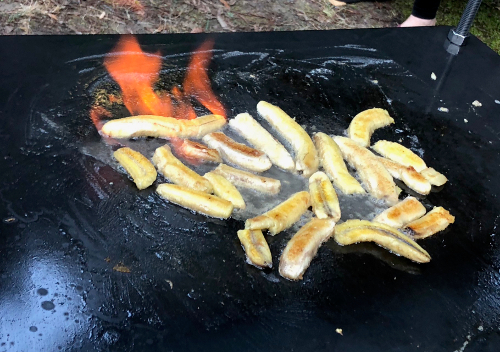
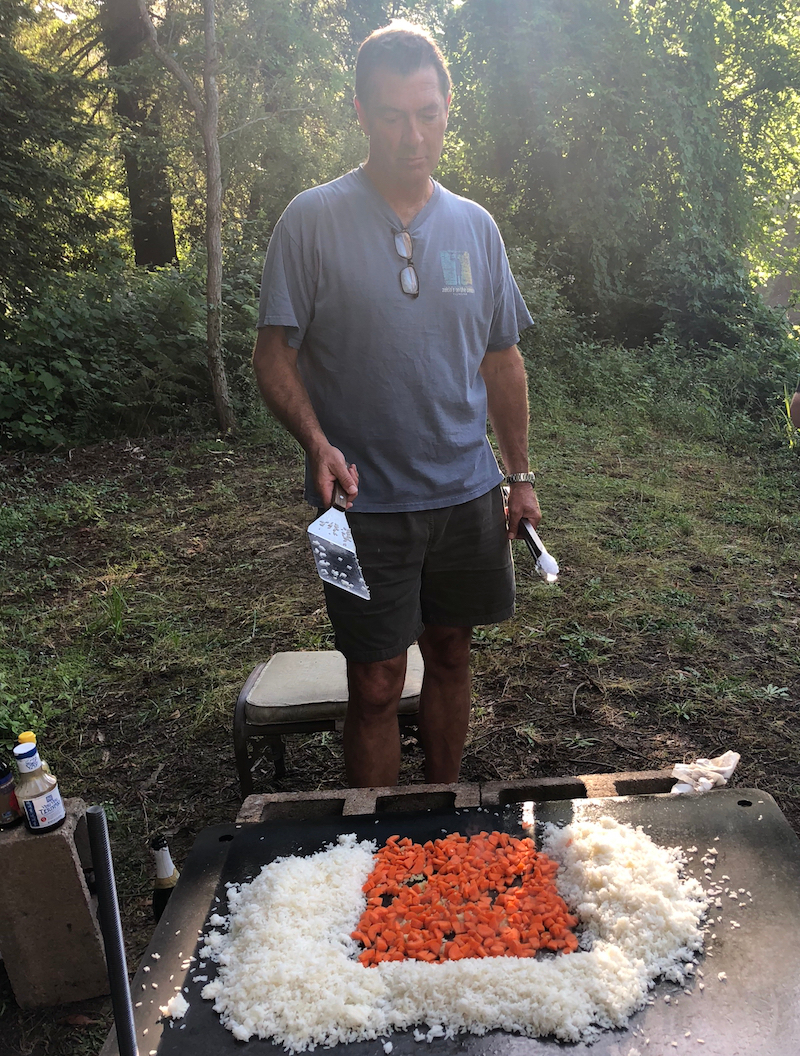
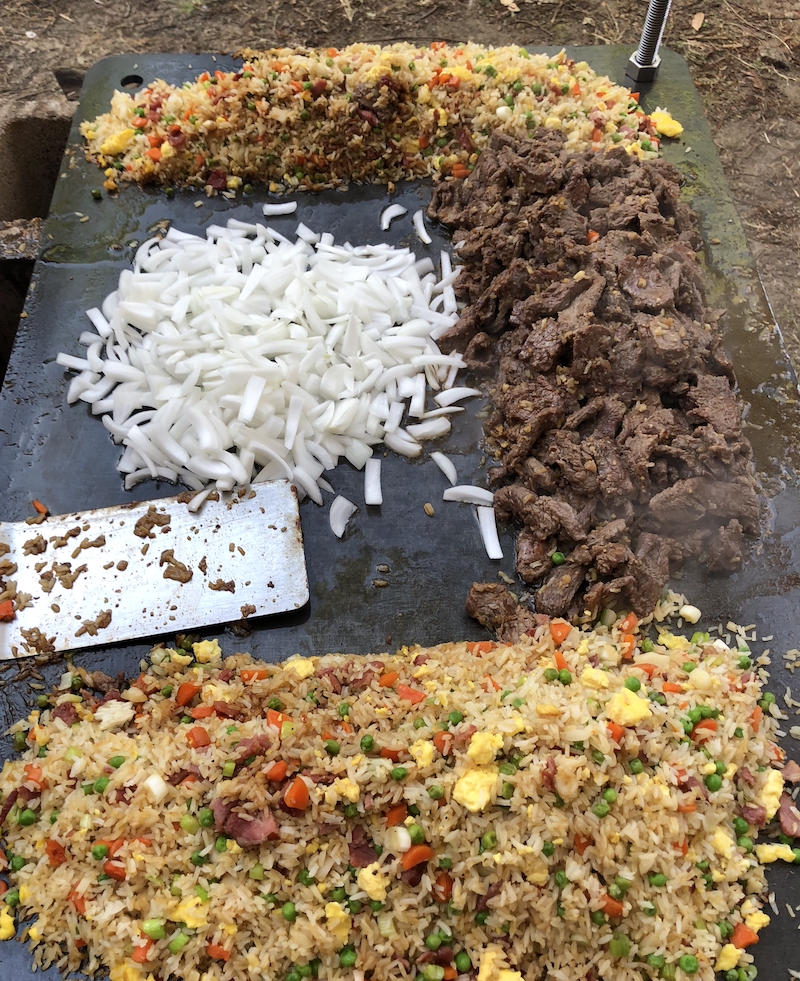
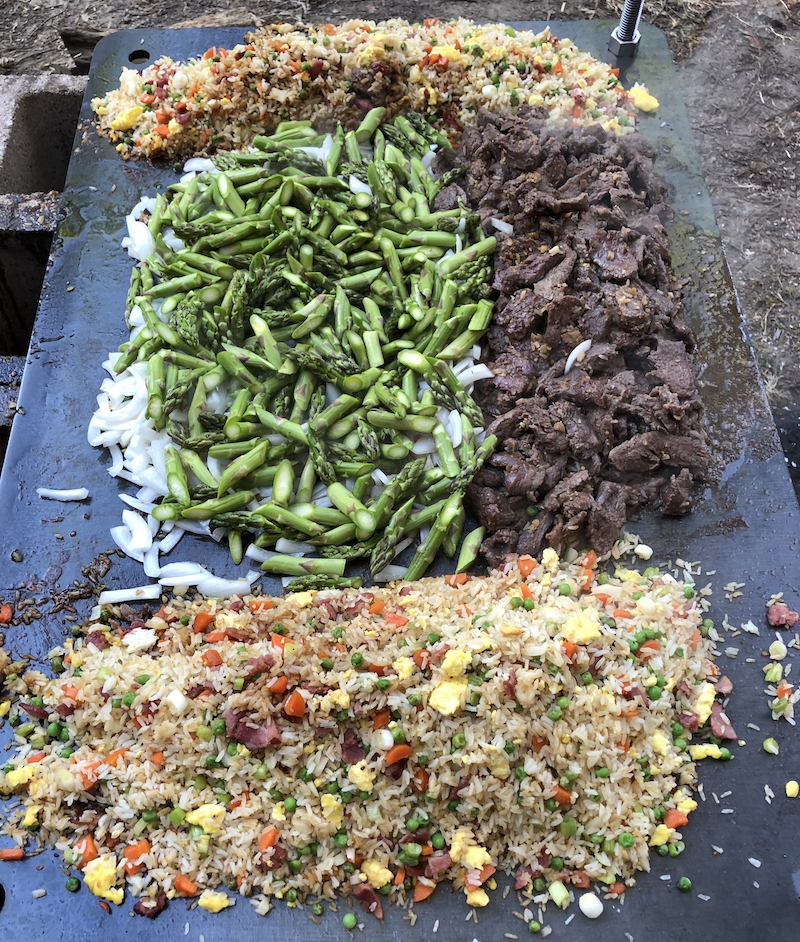
A small gallery, examples of all of the above ... cooking options, setup ideas, tools and other tradecraft. Submissions welcome (email David Maddalena with action shots).

Warrantee questions and tech support, email David Maddalena or Michael Toy

This work (irongiant.imby.net) is licensed under a
Creative Commons Attribution-NonCommercial-ShareAlike 4.0 International License